
Making a sale on the POS
6 steps. Prefer to watch? Play the 3:04 video.
Sign in to the POS. To add a product, search by name, barcode or SKU, or tap New Sale to browse by category. Out-of-stock items are marked.
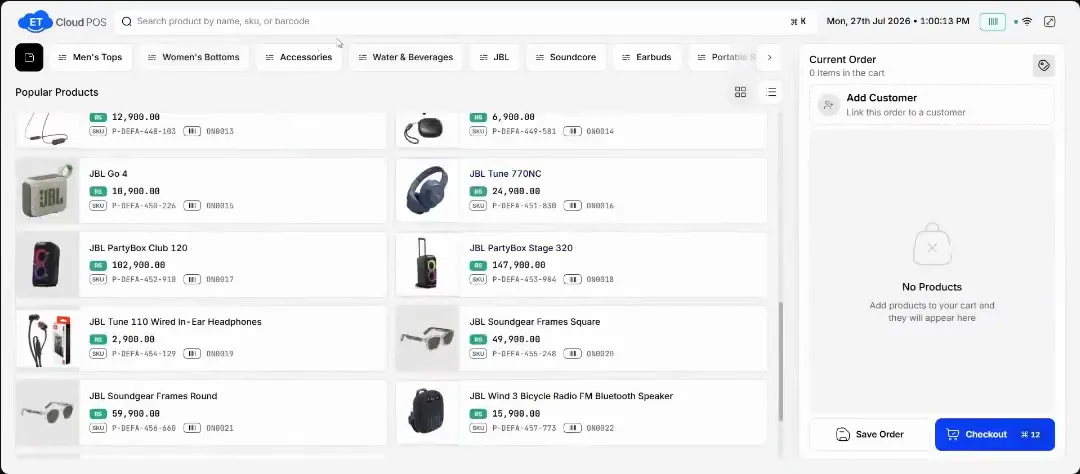
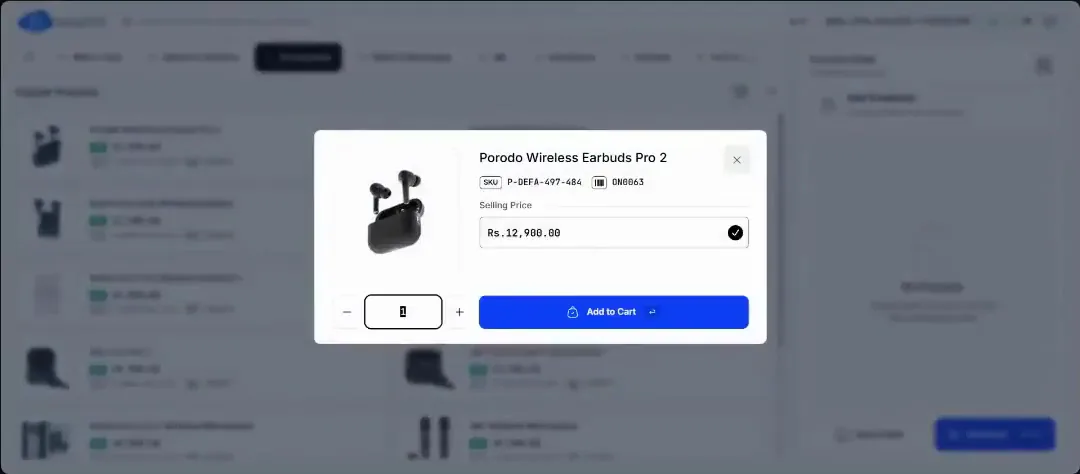
Watch this step at 0:42 → Choose the quantity and any options in the pop-up, then add to cart. With Tap to add on (lesson 12), this step is skipped.
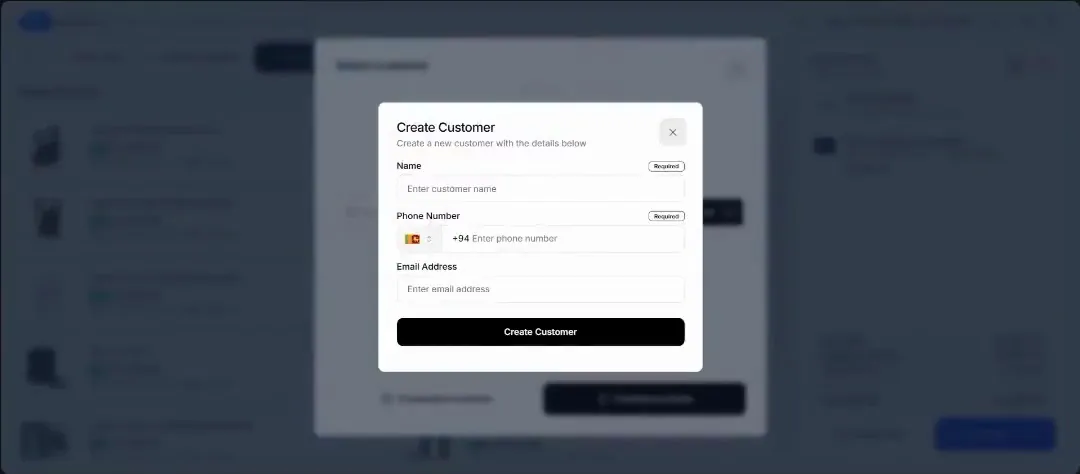
Watch this step at 1:00 → Add the customer's name and phone number, or continue as a guest.
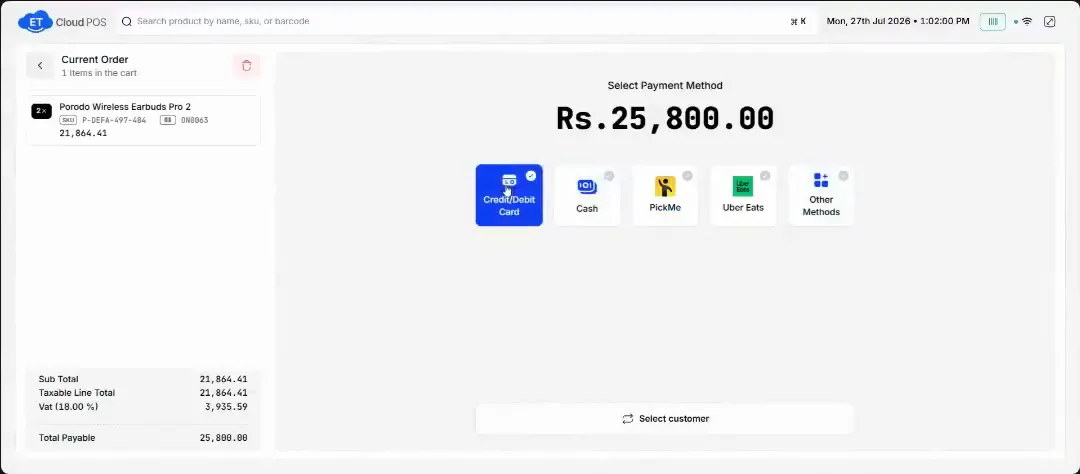
Watch this step at 1:48 → Tap Checkout and choose the payment type.
Watch this step at 2:16 → For cash, tap the amount you collected. The screen shows the change to give.
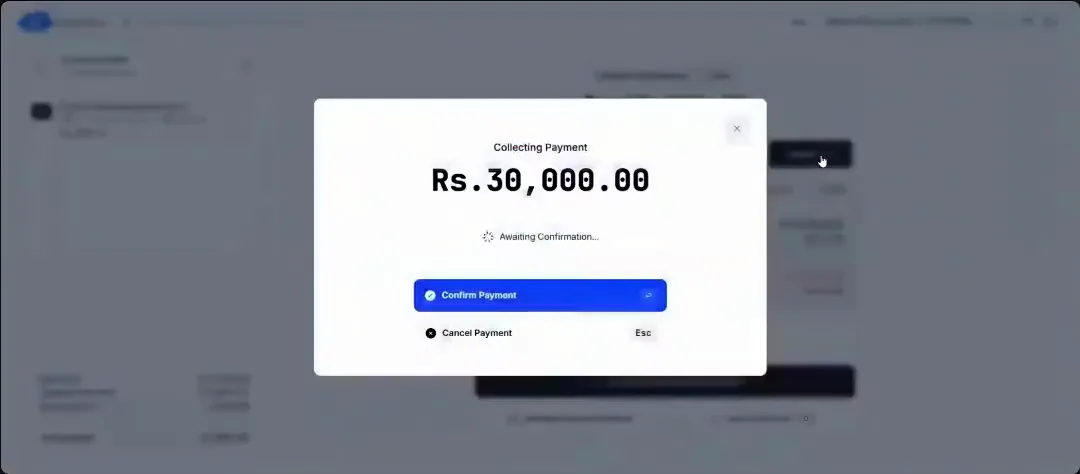
Watch this step at 2:30 → End the sale and the receipt prints. Email or SMS receipts work once set up.
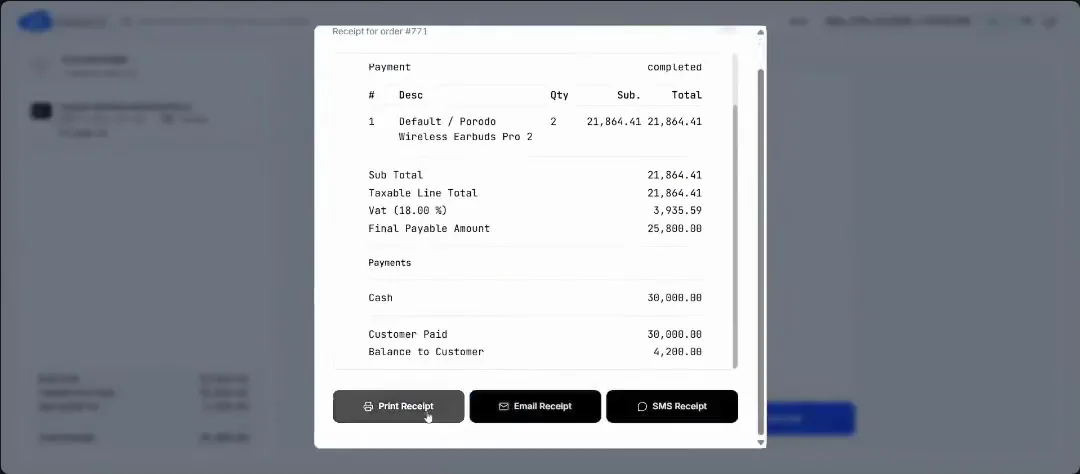
Watch this step at 2:52 →
Tip Why add customers: it's optional, but it builds a customer list for loyalty and promotions later on.
Still stuck?
Our support team is there 24/7. Tell us what you were trying to do and we'll walk you through it.